Using Duende BFF with React
Security
- security
- dotnet
- net5
- react
- Published on
- Authors

- Name
- Paul DeVito
- @pdevito3
Source Repo
An example repo for all of this can be found on my github.
Brief Background
Securing web apps is hard, especially SPAs. Lots of approaches have been trialed over the past several years, but we've had some really good lessons come out of that.
The security community has published several RFCs with those findings with all of those moving towards OAuth 2.1 in the near future. From a SPA perspective,
we are lucky enough that the expert guidance has been narrowed down to only one recommended approach, a code flow with PKCE (Proof Key for Code Exchange) protection.
We don't need to get into the details of all that here, but regardless of the mechanism you are using to get your auth token from your React app, you need a place to store that token once you have it. There's lots of options here (e.g. localStorage), but there is only one way that is secure, and that is from an HttpOnly cookie. The catch is, that this has to come from a server which is outside the scope of React.
The most common and frequently recommended pattern to solve this is called a Backend For Frontend (BFF). This is essentially a small gateway like application that lives on the server and is responsible for wrapping your auth token in a cookie for react to safely store. Additionally, it can be used as a gateway between React and your secure APIs to securely pass along the auth token in your cookie.
Duende BFF
Enter Duende BFF. This is a package released by Duende to do all the heavy lifting here for you. This is the same group that built Identity Server over the past several years who have made a huge impact in the community.
Yes, you now need to pay for it if you have a company making >1M a year, but home rolling something like this would generally cost at least as much and would very likely have holes that you don't know about. Save yourself the cost in resources, minimize the security risks, and have your dev team work on value add features to your business.
Additional Resources
Here's some more resources on auth if you want to deep dive the topic:
- OAuth Best Practices
- Duende - Securing SPAs using the BFF Pattern (once and for all)
- Duende Big Picture Docs
- Securing SPAs using the BFF Pattern
- OAuth in Plain English by Okta
Getting Started
To kick things off let's create our BFF project. This is going to be a .NET application that will wrap our React app. Whether you have a standalone React project you want to integrate in or you want
to make a new one, you're going to start out by making a new dotnet react project from your VS or Rider IDE, or with a dotnet new command.
dotnet new react -o My-Bff-ProjectYou can add this to an existing solution or a new one. In my case, I started with a new:domain from craftsman and added my BFF project to that solution.
At this point, if you have a React project you want to bring in, you can just delete the one that was generated in the ClientApp directory and add your own. Unfortunately at this point, make sure
it's bundled with webpack. It looks like with .NET 6 there is going to be support with other bundlers, so I'll probably do a follow up post doing this with Vite and maybe some additional bells and
whistles, but for now, that's what we're working with.
Adding Duende BFF
Now let's integrate Duende's BFF set up.
Start out by adding the Duende.BFF package to your project. At the moment, it's in pre-release as an RC, so you'll need to make sure your Nuget manager has those enabled.
Next, Go to the Startup.cs of your BFF and register the BFF service after your controller registration:
services.AddBff();Then we can set up our authorization server config. I'm using the Duende demo account for parity with you and ease of setup, so the below should work for anyone, but if you want to give it a whirl with your own auth server, go for it!
  services.AddAuthentication(options =>
  {
      options.DefaultScheme = "cookie";
      options.DefaultChallengeScheme = "oidc";
      options.DefaultSignOutScheme = "oidc";
  })
  .AddCookie("cookie", options =>
  {
      options.Cookie.Name = "__Host-bff";
      options.Cookie.SameSite = SameSiteMode.Strict;
  })
  .AddOpenIdConnect("oidc", options =>
  {
      options.Authority = "https://demo.duendesoftware.com";
      options.ClientId = "interactive.confidential";
      options.ClientSecret = "secret";
      options.ResponseType = "code";
      options.ResponseMode = "query";

      options.GetClaimsFromUserInfoEndpoint = true;
      options.MapInboundClaims = false;
      options.SaveTokens = true;

      options.Scope.Clear();
      options.Scope.Add("openid");
      options.Scope.Add("profile");
      options.Scope.Add("api");
      options.Scope.Add("offline_access");

      options.TokenValidationParameters = new()
      {
          NameClaimType = "name",
          RoleClaimType = "role"
      };
  });
Then we can move down to our application configuration and get things set up on that front. Nothing crazy here, we're just adding the BFF middleware next to the standard .NET auth middleware and
using MapBffManagementEndpoints to add the BFF endpoints like login, logout, etc.
  app.UseAuthentication();
  app.UseBff();
  app.UseAuthorization();

  app.UseEndpoints(endpoints =>
  {
      endpoints.MapBffManagementEndpoints();
  });
And that's it for our configuration for now. At this point, my Startup.cs looks something like this:
  public class Startup
  {
      public Startup(IConfiguration configuration)
      {
          Configuration = configuration;
      }

      public IConfiguration Configuration { get; }

      // This method gets called by the runtime. Use this method to add services to the container.
      public void ConfigureServices(IServiceCollection services)
      {
          services.AddControllersWithViews();

          services.AddBff();

          services.AddAuthentication(options =>
          {
              options.DefaultScheme = "cookie";
              options.DefaultChallengeScheme = "oidc";
              options.DefaultSignOutScheme = "oidc";
          })
          .AddCookie("cookie", options =>
          {
              options.Cookie.Name = "__Host-bff";
              options.Cookie.SameSite = SameSiteMode.Strict;
          })
          .AddOpenIdConnect("oidc", options =>
          {
              options.Authority = "https://demo.duendesoftware.com";
              options.ClientId = "interactive.confidential";
              options.ClientSecret = "secret";
              options.ResponseType = "code";
              options.ResponseMode = "query";

              options.GetClaimsFromUserInfoEndpoint = true;
              options.MapInboundClaims = false;
              options.SaveTokens = true;

              options.Scope.Clear();
              options.Scope.Add("openid");
              options.Scope.Add("profile");
              options.Scope.Add("api");
              options.Scope.Add("offline_access");

              options.TokenValidationParameters = new()
              {
                  NameClaimType = "name",
                  RoleClaimType = "role"
              };
          });

          // In production, the React files will be served from this directory
          services.AddSpaStaticFiles(configuration =>
          {
              configuration.RootPath = "ClientApp/build";
          });
      }

      // This method gets called by the runtime. Use this method to configure the HTTP request pipeline.
      public void Configure(IApplicationBuilder app, IWebHostEnvironment env)
      {
          if (env.IsDevelopment())
          {
              app.UseDeveloperExceptionPage();
          }
          else
          {
              app.UseExceptionHandler("/Error");
              // The default HSTS value is 30 days. You may want to change this for production scenarios, see https://aka.ms/aspnetcore-hsts.
              app.UseHsts();
          }

          app.UseHttpsRedirection();
          app.UseStaticFiles();
          app.UseSpaStaticFiles();

          app.UseRouting();

          app.UseAuthentication();
          app.UseBff();
          app.UseAuthorization();

          app.UseEndpoints(endpoints =>
          {
              endpoints.MapBffManagementEndpoints();
          });

          app.UseSpa(spa =>
          {
              spa.Options.SourcePath = "ClientApp";

              if (env.IsDevelopment())
              {
                  spa.UseReactDevelopmentServer(npmScript: "start");
              }
          });
      }
  }
Cleaning Up React
Packages
So if you didn't bring in your own React project, I suggest we clean things up a bit as the React project generated with dotnet new currently leaves a bit to be desired.
At the very least, you're going to want to update your React packages:
"react": "^17.0.2",
"react-dom": "^17.0.2",
"react-router-dom": "^5.2.0",
"react-scripts": "^4.0.3",
I also had to update eslint
"eslint": "^7.11.0"to work with the latest and greatest. Note that you might have to deletenode_modulesandpackage-lock.jsonif you have it.
Styling Setup
Next, I want to quickly add Tailwind CSS to my project. You can skip this step if you'd like as it's just for aesthetics, but I personally like things to look at least not based and Tailwind makes it super easy to pretty things up. I'm just following the docs for this, but here's a summary.
- Add the packages
npm install -D tailwindcss@npm:@tailwindcss/postcss7-compat postcss@^7 autoprefixer@^9 @craco/craco- Update
package.json
{
  "scripts": {
    "test": "cross-env CI=true craco test --env=jsdom",
    "start": "craco start",
    "build": "craco build",
    "lint": "eslint ./src/"
  }
}- Add
craco.config.js
module.exports = {
  style: {
    postcss: {
      plugins: [require("tailwindcss"), require("autoprefixer")],
    },
  },
};- Init Tailwind Config
npx tailwindcss-cli@latest initAnd update purge in the config file:
purge: ['./src/**/*.{js,jsx,ts,tsx}', './public/index.html'],
- Update
index.css
@tailwind base;
@tailwind components;
@tailwind utilities;- Update
Home.js
import React from "react";

function Home() {
  return <div className="text-purple-500">hello tailwind</div>;
}

export { Home };
Add React Query
Again, this is somewhat optional as all you really need to do is be able to call the BFF endpoints, but React Query makes this really easy. I'm also using axios, but fetch would work just fine too.
- Install the packages
npm install react-query axios- Update your
App.jswith the query provider. I'm also adding dev tools here.
  import { QueryClientProvider, QueryClient } from 'react-query';
  import { ReactQueryDevtools } from 'react-query/devtools'
  ///
  render () {
    return (
      <QueryClientProvider client={new QueryClient()}>
          <Layout>
            <Route exact path='/' component={Home} />
            <Route path='/counter' component={Counter} />
            <Route path='/fetch-data' component={FetchData} />
          </Layout>
          <ReactQueryDevtools initialIsOpen={false} />
      </QueryClientProvider>
    );
  }
Setting up the Login and Logout Calls
Okay, so one of the primary goals of the BFF is to be able to pass an HTTPOnly cookie to our React app so it can store our JWT securely. We have our auth server set up (Duende's demo server) and we have our .NET app set up to route our login endpoints there, but we need to set up React to call those endpoints, so let's do that.
First, logging in. I'm going to set this up on my Home.js page to keep things easy. Regardless of the exact implementation, all you really need is to add an anchor tag that hits /bff/login?returnUrl=/.
So, at the moment, my Home.js looks really exciting:
import React from "react";

function Home() {
  return (
    <a
      href="/bff/login?returnUrl=/"
      className="inline-block px-4 py-2 text-base font-medium text-center text-white bg-blue-500 border border-transparent rounded-md hover:bg-opacity-75"
    >
      Login
    </a>
  );
}

export { Home };
Logging out is a little bit harder as you need to know what your sid is to get something along the lines of /bff/logout?sid=3C4C477A5B49D41297AW0085DD9C2EF4 as your logout url.
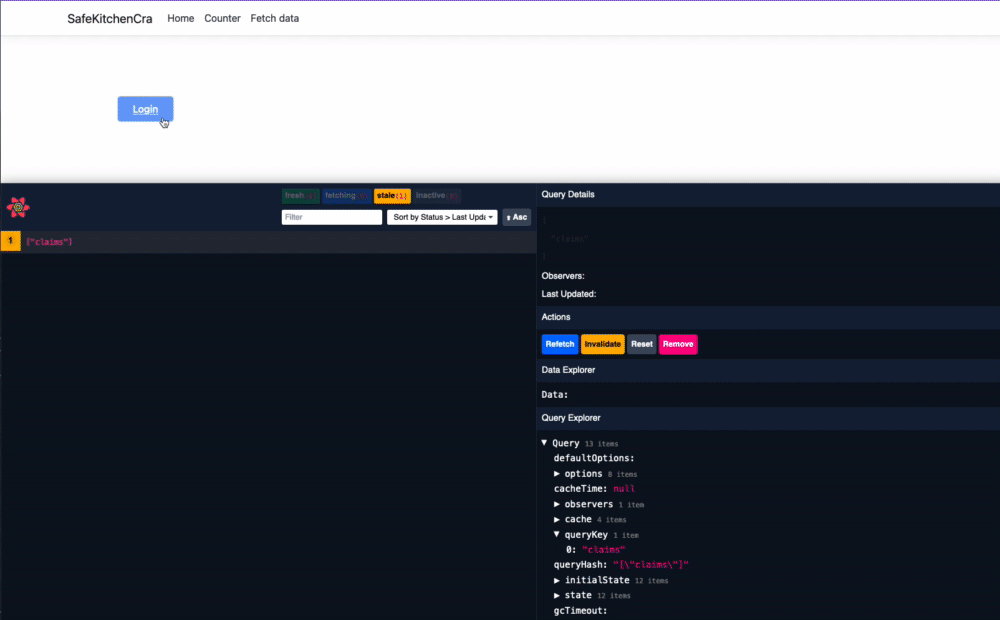
To get this, let's setup an api call to check our claims to see whether or not we're logged in. To do this, I'm going to make a new file in my react project called claims.jsx which will look something like this:
import axios from "axios";
import { useQuery } from "react-query";

const claimsKeys = {
  claim: ["claims"],
};

const config = {
  headers: {
    "X-CSRF": "1",
  },
};

const fetchClaims = async () =>
  axios.get("/bff/user", config).then((res) => res.data);

function useClaims() {
  return useQuery(claimsKeys.claim, async () => fetchClaims(), {
    staleTime: Infinity,
    cacheTime: Infinity,
    retry: false,
  });
}

export { useClaims as default };
Regardless of your implementation, the important part here is that you have something that can make a call to /bff/user with an X-CSRF header to protect against cross-site request forgery.
Now, we can go back to Home.js, add in our claim hook, and get the info we need out if it. Here, I'm grabbing the logout url using the bff:logout_url claim and getting the name as well.
import React from "react";
import useClaims from "../apis/claims";

function Home() {
  const { data: claims, isLoading } = useClaims();
  let logoutUrl = claims?.find((claim) => claim.type === "bff:logout_url");
  let nameDict =
    claims?.find((claim) => claim.type === "name") ||
    claims?.find((claim) => claim.type === "sub");
  let username = nameDict?.value;

  if (isLoading) return <div>Loading...</div>;

  return (
    <a
      href="/bff/login?returnUrl=/"
      className="inline-block px-4 py-2 text-base font-medium text-center text-white bg-blue-500 border border-transparent rounded-md hover:bg-opacity-75"
    >
      Login
    </a>
  );
}

export { Home };
Now we can actually set up our logout button and give it an endpoint to hit. I'm also going to toggle the login/logout button depending on my state. This isn't production ready, but it illustrates the point:
import React from "react";
import useClaims from "../apis/claims";

function Home() {
  const { data: claims, isLoading } = useClaims();
  let logoutUrl = claims?.find((claim) => claim.type === "bff:logout_url");
  let nameDict =
    claims?.find((claim) => claim.type === "name") ||
    claims?.find((claim) => claim.type === "sub");
  let username = nameDict?.value;

  if (isLoading) return <div>Loading...</div>;

  return (
    <div className="p-20">
      {!username ? (
        <a
          href="/bff/login?returnUrl=/"
          className="inline-block px-4 py-2 text-base font-medium text-center text-white bg-blue-500 border border-transparent rounded-md hover:bg-opacity-75"
        >
          Login
        </a>
      ) : (
        <div className="flex-shrink-0 block">
          <div className="flex items-center">
            <div className="ml-3">
              <p className="block text-base font-medium text-blue-500 md:text-sm">{`Hi, ${username}!`}</p>
              <a
                href={logoutUrl?.value}
                className="block mt-1 text-sm font-medium text-blue-200 hover:text-blue-500 md:text-xs"
              >
                Logout
              </a>
            </div>
          </div>
        </div>
      )}
    </div>
  );
}

export { Home };
At this point, things should be working!
Calling an API through the BFF
At this point, we are able to authenticate with the BFF and get our JWT back in a secure storage location (the HTTPOnly cookie), but we aren't really doing anything with the JWT at this point. Generally, you'll want to be able to call a secure API and pass it the JWT to let it know that you have permission to access whatever you're try to get at.
Setting up the BFF
To do this, we obviously need to have an API endpoint to hit. This could be anything, but in my case, I have a web api as another project in my solution, so I'm going to call that one.
In this case, I want to tell the BFF to route my react calls from /api/recipes to be routed to https://localhost:8753/api/recipes because that's where my api is running.
To do this, we just need to go our Startup.cs and add a new endpoint registration to our middleware.
  app.UseEndpoints(endpoints =>
  {
      endpoints.MapBffManagementEndpoints();

      endpoints.MapRemoteBffApiEndpoint("/api/recipes", "https://localhost:8753/api/recipes")
          .AllowAnonymous();
  });
I'm setting mine to be anonymous here with AllowAnonymous(), but you can require an auth token with something like .RequireAccessToken(TokenType.User); where the token type can be User, Client, or UserOrClient.
See the Duende docs on remote apis for more details.
You can also set up controllers inside your BFF project that can be hit directly from your React app. These are called local apis and can be set up like so:
  endpoints.MapControllers()
      .RequireAuthorization()
      .AsBffApiEndpoint();
⚠️ Be aware that above example is opening up the complete
api/recipesAPI namespace to the frontend and thus to the outside world. Try to be as specific as possible when designing the forwarding paths.
Setting up React
Now let's call the BFF route from React and prove that we actually get routed to our api. I'm going to start by making a new React Query hook called recipes.jsx. The important thing to note here is that I'm
just calling whatever local path I configured in my BFF (i.e. /api/recipes).
import axios from "axios";
import { useQuery } from "react-query";

const claimsKeys = {
  claim: ["recipes"],
};

const config = {
  headers: {
    "X-CSRF": "1",
  },
};

const fetchClaims = async () =>
  axios.get("/api/recipes", config).then((res) => res.data);

function useRecipes() {
  return useQuery(claimsKeys.claim, async () => fetchClaims(), {
    staleTime: Infinity,
    cacheTime: Infinity,
  });
}

export { useRecipes as default };
Then I'm going to put it into my Home.js page to see if I can actually get the data.
import React from "react";
import useClaims from "../apis/claims";
import useRecipes from "../apis/recipes";

function Home() {
  const { data: claims, isLoading } = useClaims();
  const { data: recipes } = useRecipes();
  let logoutUrl = claims?.find((claim) => claim.type === "bff:logout_url");
  let nameDict =
    claims?.find((claim) => claim.type === "name") ||
    claims?.find((claim) => claim.type === "sub");
  let username = nameDict?.value;

  if (isLoading) return <div>Loading...</div>;

  return (
    <div className="p-20">
      {!username ? (
        <a
          href="/bff/login?returnUrl=/"
          className="inline-block px-4 py-2 text-base font-medium text-center text-white bg-blue-500 border border-transparent rounded-md hover:bg-opacity-75"
        >
          Login
        </a>
      ) : (
        <div className="flex-shrink-0 block">
          <div className="flex items-center">
            <div className="ml-3">
              <p className="block text-base font-medium text-blue-500 md:text-sm">{`Hi, ${username}!`}</p>
              <a
                href={logoutUrl?.value}
                className="block mt-1 text-sm font-medium text-blue-200 hover:text-blue-500 md:text-xs"
              >
                Logout
              </a>
            </div>
          </div>
        </div>
      )}
      {
        <ul className="py-10 space-y-2">
          {recipes &&
            recipes.data.map((recipe) => (
              <li className="text-medium px-4 py-3 rounded-md border border-gray-20 shadow">
                {recipe.name}
              </li>
            ))}
        </ul>
      }
    </div>
  );
}

export { Home };
You'd obviously want this to be done more elegantly in practice as the recipes don't even show while the claims are loading, but this is enough to prove that we can go through!
Closing Thoughts
There's certainly more that would need to be done here in a production app, but hopefully this is enough to get things going! I'll likely do a follow up to this once .NET 6 rolls around to see if I can get it working with Vite and a few more bells and whistles so keep an eye out!
Regardless, I hope this was helpful! I'd love to hear your thoughts on Twitter @pdevito3.